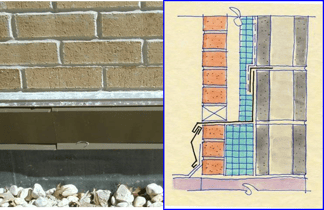
 One of the most challenging and important details to ensure correct design and construction on any project occurs when a low roof abuts a tall wall. If this detail leaks then it is highly likely the symptoms will be noticeable to the building owner and occupants with stained or sagging ceiling tile, water damaged interior walls, or an impromptu interior water feature. The scope and cost of the repairs associated with an improperly drawn or executed detail at this location can be staggering.
 Because of the high risk of potential damage to expensive interior finishes and general angst for the building owner, moisture control at a low-roof to tall-wall junction starts with a proper architectural detail. During the thousands of plan and specification reviews conducted by IMI over the years, we look for these problematic details to help designers understand and develop durable options that are practical to assemble in the field. Great details at this location are difficult enough to achieve when a flat roof interfaces with a vertical wall, but it becomes even more challenging when the roof is sloped.
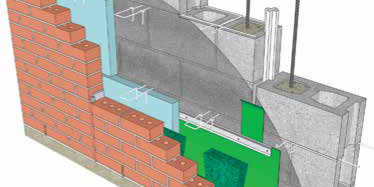
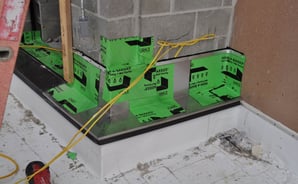
The key to a successful roof-to-masonry-wall detail is to create a transition that is continuous, durable, flexible, watertight and perhaps even redundant. All of this should be in place before the veneer is installed. To achieve this, it is imperative that the mason contractor, roofing contractor, and other trades who will work in this area coordinate to define each other’s scope of work. Supervision during installation also helps. Mason contractors could even take photographs of the installation sequence to aid in any diagnostic action if a problem arises.
To achieve continuity at the roof-to-wall interface, often times the roofing contractor will provide a metal receiver piece for the mason to install so the roofer can connect up to it later. It is imperative that the roof termination and the masonry flashing connect and are fastened mechanically with either sheet metal screws or rivets. The mechanical fastener penetrations are not a moisture control issue because the roofing membrane is watertight to the wall under this connection.
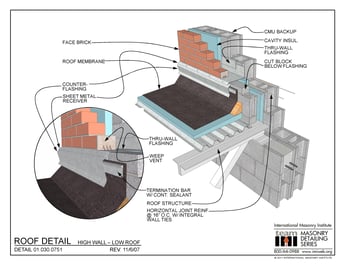
Other important attributes of this detail include:
- properly lapped flashing to be watertight, flexible and possibly redundant
- flashing that will not sag
- slope flashing to the exterior
- secure vertical leg of flashing to support wall with a termination bar or other method to ensure it will not fall down in the wall cavity
- coordinate flashing with the air and water barrier on the support wall
- proper weep vent type and spacing. (weep vents can be spaced closer than normal)
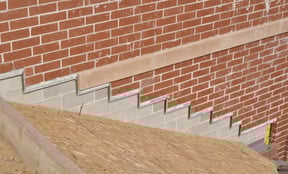
 Since the risk of failure and cost of repair at roof-to-wall details is sky high (pun intended), some designers and contractors prefer to install two layers of flashing to ensure durable performance to hopefully eliminate call-backs. On some jobs we have seen stainless steel flashing and adhesive membrane flashing work together to provide redundancy.
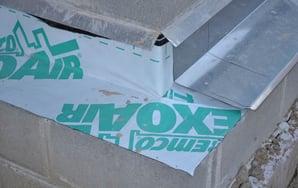
IMI is available for consulting to explore design and installation options for this critical detail – we have seen many “solutions.”
For more information and insights into challenging roof-to-wall flashing details, contact IMI.